In the first part of this article I have went over two of the most powerful candlestick patterns i have ever used – the Marubuzo and the Engulfing patterns. Let’s quickly summarize the most important facts about the two patterns. For more detailed information go ahead and read the first post.
- 1 The Marubozu Candlestick Pattern
- 2 The Engulfing Candlestick Pattern
- 3 The Equal Shadow Candlestick Pattern
- 4 Why does the pattern appear?
- 5 Trading The Equal Shadows Pattern
- 6 The Hatchet Pattern
- 7 Why is the Hatchet Pattern More Reliable Than The Hammer Pattern?
- 8 IMPORTANT:
- 9 Trading the Hatched Pattern
The Marubozu Candlestick Pattern
Type of the pattern: Reversal.
Success Rate: 80-90% (best scenario where extra confirmations are applied).
TF Performance: The higher the TF the more reliable the pattern is.
Categories: Complete Marubozu, Closing Marubozu, Opening Marubozu
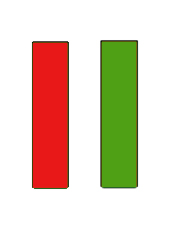
Description: The complete marubozu pattern has not wigs (shadows) from either side of the candle. The pattern appears at the end of a trend signifying desperate tries of the bears or the bulls to continue the trend but usually once the pattern appears price will reverse within a few bars. Very often we will see one last spike in the direction of the trend after the marubozu pattern.
Bearish and Bullish Marubozu
The Engulfing Candlestick Pattern
Type of the pattern: Reversal.
Success Rate: 70-80% (best scenario where extra confirmations are applied) .
TF Performance: The higher the TF the more reliable the pattern is.
Categories: Bullish, Bearish
Description: The pattern is known to appear at the end of a trend. When price reaches a certain level and the momentum is exhausted buyers or sellers would close their positions in effort to collect profits. At this point the current candle would engulf the previous candle(s) completely showing very strong momentum in the opposite direction of the current trend. This is indeed the sign that the trend is over and we can expect a reversal to occur.
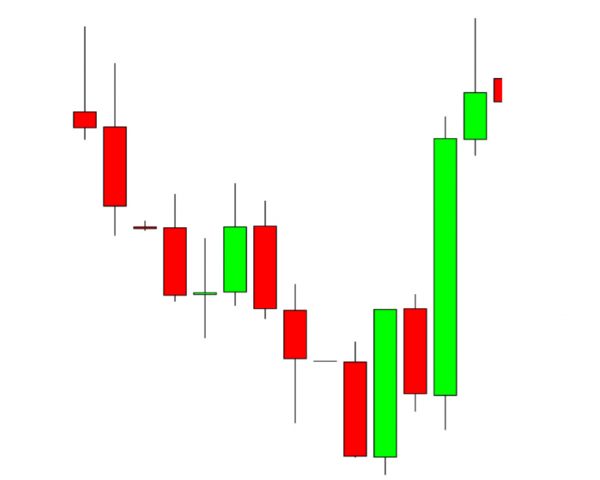
Bullish Engulfing
Now let’s move forward to the new patterns I would like to discuss today .
The Equal Shadow Candlestick Pattern
This pattern is existing under the radar of many traders appearing on their charts unnoticed. It is not a very common pattern discussed on the internet or elsewhere which makes it so powerful. As the name suggests the equal shadows pattern has wigs or shadows on both sides that have pretty much the same size.
Equal Shadows Pattern
Why does the pattern appear?
Market starts moving from a certain price and the buyers decide that they want to overpower the market. They initiate a deliberate decrease in prices. This causes the lower shadow to form. After the price is attractive enough, they push the price up. When prices are high enough they calm down and keep the high prices stable. However, it causes a small fall in prices. This is how the upper shadow is formed. This fall in prices attracts other buyers to this specific currency pair, which causes the strong up move to continue.
Here is one more example:
Trading The Equal Shadows Pattern
First of all you should remember that when the candlestick is green you should be expecting a bullish move afterwords and when the candle is red, the opposite – bearish move should follow.
Best and most reliable way to trade this pattern is at the end of a correction inside an existing trend or at the end of a trend (what tools and methods do you use to recognize the direction of the trend, whether the trend is near its end and when there is a correction?).
Using the example above let’s have a closer and more detailed look at what happened:
As we can see on the above chart, a downtrend has ended, a Doji candlestick has been formed and then…. A candlestick with equal shadows has appeared two candlesticks after the end of the downtrend.
This is how trading the Equal Shadows looks during the corrective phase of a trend when the pattern appears:
Clearly the trend is down when we start to see green hesitating candles. Notice how for the pretty much same duration during the down move price has moved a lot while during the green candles price only managed to push up only around 50% of the down move. This is when the equal shadows pattern appeared giving a perfect sell triggered.
IMPORTANT – it is extremely important for this pattern to appear 1 or maximum 2 candles after the correction or trend has ended. If it appears in the middle of the trend it is not as reliable.
Entering the trade should happen right after the close of the candle. Best and most conservative way for protection would be above or below the last high/low that has been created before the pattern was formed.
You may choose to trade this pattern by itself but as already mentioned in the first part of this article it would be best to trade it in conjunction with other methods to increase the success rate.
The target could be based simply on risk:reward or else. For example you may use opposite divergence in order to close the trade.
Ok let’s move forward to the next one.
The Hatchet Pattern
The hatchet pattern looks a lot like the hammer pattern but it has one slight difference – there is a shadow only at one side of the body. It doesn’t appear as often as the hammer pattern but I dare to say that it has better performance.
And this is how the reverse hatchet pattern looks like:
Why is the Hatchet Pattern More Reliable Than The Hammer Pattern?
To explain why, we need to first of all understand how are both patterns formed. A Bullish Hammer is formed when the candle opens and bears push the price very hard until bulls take control during the same candle and send price up again, leaving a huge wig at the lower side of the candle. Near the end of the candle price would drop a bit creating a small upper shadow. When this pattern is found at the end of a down trend it usually predicts a reversal.
Now when we compare it to the Hatchet pattern, the only difference would be that there is no upper shadow. Bulls would push the price up so strong that the candle’s close price is equal to the candle’s highest price. That shows very strong momentum (stronger than the hammer’s momentum) and thus increasing the chances of reversal.
Of course same applies for the opposite scenario when we have a red candle with huge upper wig.
IMPORTANT:
Keep in mind that the bigger the shadow compared to the body the more reliable the pattern will be. Another important note to remember is that the pattern must appear at the end of a trend or a correction. If it forms during a range simply ignore it.
Now let’s take a look at some examples:
At the end of a downtrend the bullish hatched pattern forms, predicting a trend reversal.
The bearish hatched forms at the end of the bullish trend. Perfect sell trigger.
Trading the Hatched Pattern
Like with any other candlestick pattern you may choose to trade it by itself or in combination with other filters and methods. If a divergence completes with such pattern the odds of a reversal are pretty strong. Another good example for reliable combination is when the pattern form at strong support/resistance zone or a trend line – especially when a false break is also there.
The protection should be placed below the low or above the high depending on the direction. Try to aim for at least 1:2 risk:reward ratio.
Money Management is crucial to trading! Even if you had a method that delivers outstanding numbers you might turn out losing money rather than earning pips because of your money management. Pay attention to it!
That’s all for part two of the Most Powerful Candlestick Patterns. Stay tuned for part 3!
Yours,
Vladimir
